Apr 29, 2013 | From my Kitchen
Recently I have been trying to add as many healthy foods to my kitchen as possible to try and outdo the damages our bodies face everyday from various sources. Quinoa is a food which has become popular in the past few years but has been considered a superfood for thousands of years, since the time of the Incas. Quinoa is very high in protein, fiber, magnesium, iron, & manganese and must be a staple in every home. Very easy to cook, for every cup of quinoa you require two cups of liquid and just cook till done. Since quinoa has no strong flavor, it absorbs any flavors added to it, which is why I decided to make it similar to the way I cook Bulgar (burghol), a dish my daughter loves.
(more…)
Aug 7, 2012 | From my Kitchen
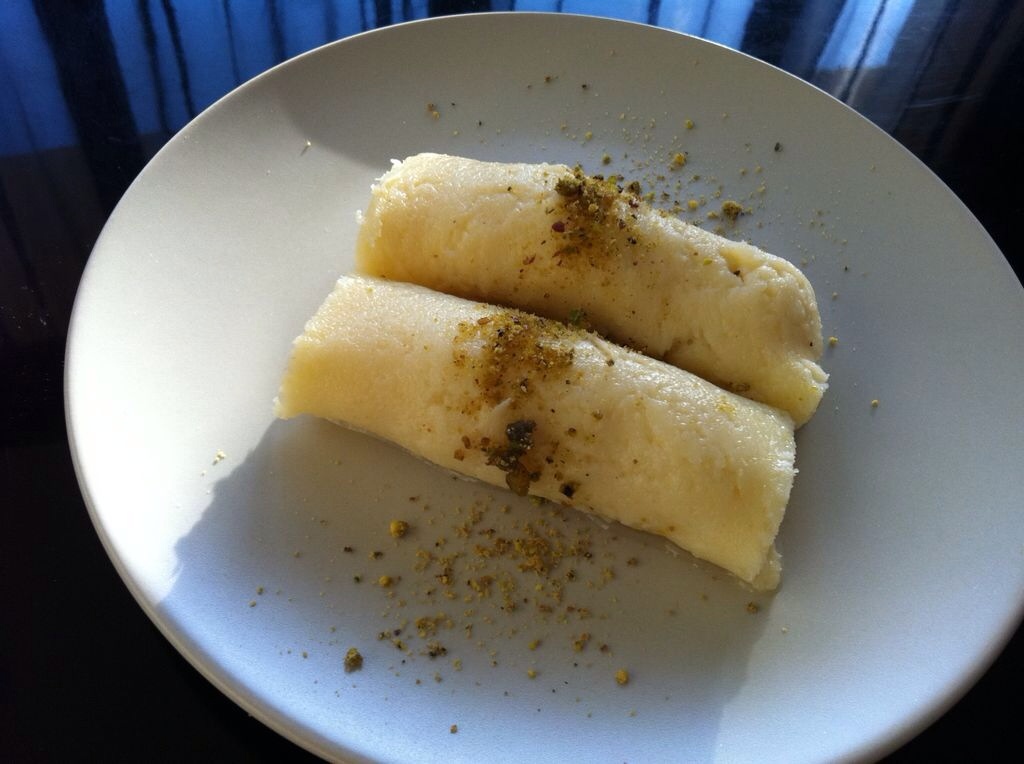
There is a charm about the month of Ramadan, and for some reason there are dishes people crave only during this holy month. Whether it’s the idea of fasting for a long time or just traditions brought forth across generations, sweets and in particular Arabic sweets are amongst the favorite indulgences in the evening. One of the popular arabic desserts is ” Halawat Al Jibn”, which means ” the sweetness of cheese” is just what the name implies, a dessert based on cheese. This is a household favorite and very popular in Lebanon specially in the Northern part of the country, i.e. in Tripoli.
Instead of waiting to visit Lebanon to try it, why don’t you try this Super Easy method, trust me you won’t regret it. For years we would gather around mom trying to steal bits and pieces of the dough that didn’t make the cut!
This dessert is comprised of 3 parts, the cheese dough, the syrup, and the cream filling ( ashta). For best results have the ashta and syrup prepared before you work on the cheese. Recipe (very easy) for both is found on the Atayef post i posted last year.
Link.
May 15, 2012 | blog, From my Kitchen

Yep I am a chocoholic, a big fan of warm chocolate in particular,and chocolate crepes happen to be one of my favorite desserts. I have a policy of “prioritizing” calories, in other words I would eat a high calorie meal with the condition that it’s “worth it”. Since I only like crepes filled with Nutella, I thought why not have low calorie crepes to make up for the filling. It’s sort of a compromise, less guilt for me.
This is one of the easiest recipes with only 60 calories per crepe (remember Nutella has around 100 cals per TBS, so you do the math when indulging).
For the crepes you will need:
1 egg
1/2 cup flour
1/4 tsp salt
2/3 cups fat free Milk
Just use a whisk and mix them altogether, try not to have any lumps. As you notice there is no source of fat in this recipe, no oil or butter which is unusual, this is why in addition to using a non-stick pan you will need to use non-stick cooking spray, brand doesn’t matter. Put 1/4 cup of batter in the pan, swirl it around then flip to the other side when done.
You can use any filling you want since you won’t feel guilty eating the crepe itself 😉
Enjoy!
Jan 18, 2012 | From my Kitchen

I tried several recipes before I stuck to this one, these waffles are lightly crispy on the outside yet fluffy on the inside, just the way waffles are supposed to be. Look no further, use this ideal recipe next time. You do need a waffle iron though. I got mine of the daily deals website sheeel.com for KD 7.5, which is actually an amazing deal!
For the waffles you will need:
1 3/4 Cups flour
2 TBS sugar
1 TBS Baking powder
2 eggs
1 3/4 cups Milk (I used fat-free milk)
1/2 cup oil
1 tsp Vanilla
Turn on the waffle iron.
In a bowl combine the dry ingredients in a large bowl. In a separate bowl beat all the wet ingredients then add them to the dry ones stirring until moistened.
And that’s basically it! Very easy batter with incredible results.
You can have you waffles with maple syrup, Nutella, berries and cream, powdered sugar, be creative, kids will love it as well and it takes minutes to make.
Bon Appétit !
(more…)
Dec 12, 2011 | blog, From my Kitchen

Although red velvet cakes have been popular for so long in the U.S. and Canada, only recently have we started to experience the rage here, everywhere I go I hear people talking about the latest red velvet cupcakes, cakes, and cookies. This is what got me to give it a try. After checking many recipes, I thought I’d combine different tips, and I guess it worked out well. Try it out , I’d love to know the results!
Red Velvet Cake
* 2 1/2 cups (250 grams) sifted cake flour
* 1/2 teaspoon salt
* 2 tablespoons (15 grams) unsweetened cocoa powder
* 1/2 cup (110 grams) unsalted butter, at room temperature
* 1 1/2 cups (300 grams) granulated white sugar
* 2 large eggs
* 1 teaspoon pure vanilla extract
* 1 cup (240 ml) buttermilk (if you don’t have buttermilk prepare 1 TBS vinegar and 1 cup of Milk, will explain below)
* 2 tablespoons liquid red food coloring
* 1 teaspoon white distilled vinegar
* 1 teaspoon baking soda
Directions:
* Preheat oven to 175 degrees C and place rack in center of oven. Butter two (23 cm) round cake pans and line the bottoms of the pans with parchment paper or use cooking spray like I did. Set aside.
* In a mixing bowl sift together the flour, salt, and cocoa powder. Set aside.
* In bowl of your electric mixer, or with a hand mixer, beat the butter until soft (about 1-2 minutes). Add the sugar and beat until light and fluffy (about 2-3 minutes). Add the eggs, one at a time, beating well after each addition. Add the vanilla extract and beat until combined.
* In a measuring cup whisk the buttermilk with the red food coloring. If you don’t have buttermilk combine 1 TBS of white vinegar with 1 cup of milk and let it rest 5-10 minutes, use that mixture to combine with the red food coloring. With the mixer on low speed, alternately add the flour mixture and buttermilk to the butter mixture, in three additions, ending with the flour.
* In a small cup combine the vinegar and baking soda. Allow the mixture to fizz and then quickly fold into the cake batter.
* Working quickly, divide the batter evenly between the two prepared pans and smooth the tops with an offset spatula or the back of a spoon. Bake in the preheated oven for approximately 25 – 30 minutes, or until a toothpick inserted in the center of the cakes comes out clean. Cool the cakes in their pans on a wire rack for 10 minutes. Place a wire rack on top of the cake pan and invert, lifting off the pan. Once the cakes have completely cooled, wrap in plastic and place the cake layers in the refrigerator for at least an hour to make it easier to apply the frosting.
And now for the cream cheese frosting.

Cream Cheese Frosting
* 1/2 cup butter, softened
* 8 ounces (225g) cream cheese
* 3- 4 cups confectioners’ sugar (depending on desired sweetness)
* 2 teaspoons vanilla extract
Beat softened butter and cream cheese until well blended. Add powdered sugar and vanilla. Beat until creamy.
I used light Philadelphia cheese and light butter because this is how I am used to shopping, you can definitely use the regular ones, the frosting might turn out a little bit more in tact if you do. There are also many recipes where you can add white chocolate or Mascarpone cheese to the basic frosting mixture.
Apply a thick layer in the middle between the two cakes, and then drizzle the rest on top.

Bon Appétit !
Aug 17, 2011 | From my Kitchen

I am a bit in to the Ramadan cooking spirit these days, I am getting off work a couple of hours earlier than usual, which is giving me time to prepare different meals and desserts regularly. I usually buy ready made “Katayef” dough and make my own fat-free cream filling and sugar syrup at home. Today I was too lazy to go get them from Sultan Supermarket /TSC so I decided I’ll prepare the batter at home.
This type of Lebanese sweet is of three parts, the pancakes, the filling, and the sugar syrup. To save time I usually prepare the syrup and filling a night ahead, but that’s not really necessary.
Ok prepare your shopping list, this is what you will be needing for each phase with instructions on how to prepare them.
A- For the mini pancakes (batter)
2 cups flour
1 TBS baking powder
2 small tsp fast acting yeast
1 TBS sugar
1 TBS fat free powder milk
1 3/4 cups warm water
Mix the flour, baking powder, yeast, sugar, and milk, then slowly add the warm water, leave the batter 15-30 min to rest. Heat a small non-stick skillet and use cooking spray (or a little bit of oil). Take out Tablespoonfuls of batter to form small pancakes, cook from one side only, you will see bubbles form on the top, DON’T FLIP THEM, they should remain uncooked from the other side. just when the top dries up, remove them. Stack them on a plate and work on the filling and syrup.

B- For the filling (Kashta)
6 pieces of white toast (cut off the brown edges)
2 cups fat free milk
1 tsp vanilla
This filling is usually the worst part of any Lebanese dessert and the most fattening, but with this recipe you will see how light and guilt free it is. Cut the white bread into small squares , put them in a pot, pour over the milk and the vanilla, mix them till they form a consistent texture. Put aside.
C- For the sugar syrup
2 cups sugar
1 cup water
1 TBS lemon
1 TBS orange blossom water (Ma zaher)
Mix the sugar and water , heat till they boil , add the lemon, boil again, add the orange blossom water and boil a final time till the syrup is clear. Leave aside till it cools.

Assembly:
hold one pancake in your hand, stick the two sides together leaving the top part open, fill in a tsp or more of the filling. Make as many as you want for each person then drizzle the sugar syrup and serve. If you don’t plan to serve them all, keep all items separate and only prepare them before serving.
Try it and you won’t regret it,
Enjoy!!!